Node.js was writtern initially by Ryan Dahl on 2009 (in C++). Ryan left Node.js in 2012, as at this point he felt he had more or less fulfilled his goals.
His goals are now different. After realizing that there were some design errors impossible to fix in Node.js, he decided to create another JavaScript (also TypeScript) runtime built with V8: Deno (in Rust). Deno 1.0.0 will be finally released on 13th May 2020.

We'll see how Deno works and its differences with Node, implementing a simple chat application.
We will cover the following:
- Installing Deno
- Simple "Hello World"
- Serve an index.html
- Using WebSockets
- Third-party and deps.ts convention
- Testing
- Debugging
- Conclusion
- Code of this article
- References
Installing Deno
There are different ways to install Deno: Using curl, iwr, Homebrew, Chocolatey... See how to install it here. Deno is a single binary executable, it has no external dependencies.
In my case I'm going to use Homebrew:
➜  ~ brew install deno
➜  ~ deno --version
deno 1.0.0-rc1
v8 8.2.308
typescript 3.8.3
As we can see, there's no npm here. Npm started to be essential in the Node ecosystem... And it's a centralized (privately controlled even) repository for modules. This is now changing with Deno. We will see later how to install packages without a package.json and node_modules either.
To upgrade to the latest version we need to do deno upgrade.
I recommend to execute deno help to see all the possible usages:
USAGE:
    deno [OPTIONS] [SUBCOMMAND]

OPTIONS:
    -h, --help                     Prints help information
    -L, --log-level <log-level>    Set log level [possible values: debug, info]
    -q, --quiet                    Suppress diagnostic output
    -V, --version                  Prints version information

SUBCOMMANDS:
    bundle         Bundle module and dependencies into single file
    cache          Cache the dependencies
    completions    Generate shell completions
    doc            Show documentation for a module
    eval           Eval script
    fmt            Format source files
    help           Prints this message or the help of the given subcommand(s)
    info           Show info about cache or info related to source file
    install        Install script as an executable
    repl           Read Eval Print Loop
    run            Run a program given a filename or url to the module
    test           Run tests
    types          Print runtime TypeScript declarations
    upgrade        Upgrade deno executable to newest version

ENVIRONMENT VARIABLES:
    DENO_DIR             Set deno's base directory (defaults to $HOME/.deno)
    DENO_INSTALL_ROOT    Set deno install's output directory
                         (defaults to $HOME/.deno/bin)
    NO_COLOR             Set to disable color
    HTTP_PROXY           Proxy address for HTTP requests
                         (module downloads, fetch)
    HTTPS_PROXY          Same but for HTTPS
In case that you are using Visual Studio Code, I recommend to install this plugin to ease working with Deno:
Simple "Hello World"
For a simple "Hello world" in Deno, we just need to create a file .js or .ts, and execute it with deno run [file].
In case of .ts, it will compile + execute, meanwhile for .js, the file will be executed directly:
// example.ts file
console.log('Hello from Deno 🖐')
And in the shell:
➜  deno run example.ts
Compile file:///Users/aralroca/example.ts
Hello from Deno 🖐
The tsconfig.json file is optional because in Deno there are some TypeScript defaults. To apply the tsconfig.json we should use deno run -c tsconfig.json [file].
By the way, Deno uses web standards where possible. It's possible to use window, fetch, Worker... Our code should be compatible with both Deno and the browser.
Serve an index.html
Deno has his own standard library https://deno.land/std/ so to use their modules we can import it directly from the URL. One of its goals is shipping only a single executable with minimal linkage. This way it's only necessary to import the URL to their projects, or execute directly with deno run https://... in case of CLIs.
In order to create a http server and serve an index.html we are going to use this module: https://deno.land/std/http/.
We are going to create two files: server.ts and index.html.
index.html
<!DOCTYPE html>
<html lang="en">
  <head>
    <meta name="viewport" content="width=device-width, initial-scale=1" />
    <meta charset="utf-8" />
    <title>Example using Deno</title>
  </head>
  <body>
    index.html served correctly
  </body>
</html>
server.ts
import { listenAndServe } from 'https://deno.land/std/http/server.ts'

listenAndServe({ port: 3000 }, async (req) => {
  if (req.method === 'GET' && req.url === '/') {
    req.respond({
      status: 200,
      headers: new Headers({
        'content-type': 'text/html',
      }),
      body: await Deno.open('./index.html'),
    })
  }
})

console.log('Server running on localhost:3000')
We can use ESmodules by default instead of Common.js, indicating the file extension always at the end. Moreover, it supports the latest features as async-await.
Also, we don't need to worry about formatting anymore. Instead of using tools as Prettier, we can format the files with deno fmt command.
The first time deno run server.ts runs, we'll see two differences with respect to the "Hello World" example:
It downloads all the dependencies from
httpmodule. Instead of usingyarnornpm install, it should install all the needed dependencies before running the project. This happens only the first time, since it's cached. To clean the cache you can use the--reloadcommand.It throws an error
Uncaught PermissionDenied: network access to "127.0.0.1:3000", run again with the --allow-net flag. Deno is secure by default. This means that we can't access to the net or read a file (index.html). This is one of the big improvements over Node. In Node any CLI library could do many things without our consent. With Deno it's possible, for example, to allow reading access only in one folder:deno --allow-read=/etc. To see all permission flags, rundeno run -h.
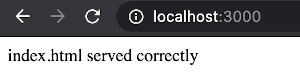
Now we are ready to serve index.html:
➜ deno run --allow-net --allow-read server.ts
Compile file:///Users/aralroca/server.ts
Server running on localhost:3000
Using WebSockets
WebSockets, UUID, and other essentials in Node are not part of the core. This means that we need to use third-party libraries to use it. Yet, you can use WebSockets and UUID among many others by using Deno standard library. In other words, you don't need to worry about maintenance, because now it will be always maintained.
To continue implementing our simple chat app, let's create a new file chat.ts with:
import {
  WebSocket,
  isWebSocketCloseEvent,
} from 'https://deno.land/std/ws/mod.ts'
import { v4 } from 'https://deno.land/std/uuid/mod.ts'

const users = new Map<string, WebSocket>()

function broadcast(message: string, senderId?: string): void {
  if (!message) return
  for (const user of users.values()) {
    user.send(senderId ? `[${senderId}]: ${message}` : message)
  }
}

export async function chat(ws: WebSocket): Promise<void> {
  const userId = v4.generate()

  // Register user connection
  users.set(userId, ws)
  broadcast(`> User with the id ${userId} is connected`)

  // Wait for new messages
  for await (const event of ws) {
    const message = typeof event === 'string' ? event : ''

    broadcast(message, userId)

    // Unregister user conection
    if (!message && isWebSocketCloseEvent(event)) {
      users.delete(userId)
      broadcast(`> User with the id ${userId} is disconnected`)
      break
    }
  }
}
Now, register an endpoint /ws to expose the chat on server.ts:
import { listenAndServe } from 'https://deno.land/std/http/server.ts'
import { acceptWebSocket, acceptable } from 'https://deno.land/std/ws/mod.ts'
import { chat } from './chat.ts'

listenAndServe({ port: 3000 }, async (req) => {
  if (req.method === 'GET' && req.url === '/') {
    req.respond({
      status: 200,
      headers: new Headers({
        'content-type': 'text/html',
      }),
      body: await Deno.open('./index.html'),
    })
  }

  // WebSockets Chat
  if (req.method === 'GET' && req.url === '/ws') {
    if (acceptable(req)) {
      acceptWebSocket({
        conn: req.conn,
        bufReader: req.r,
        bufWriter: req.w,
        headers: req.headers,
      }).then(chat)
    }
  }
})

console.log('Server running on localhost:3000')
To implement our client-side part, we are going to choose Preact to be able to use modules directly without the need of npm, babel and webpack, as we saw on the previous article.
<!DOCTYPE html>
<html lang="en">
  <head>
    <meta charset="UTF-8" />
    <title>Chat using Deno</title>
  </head>
  <body>
    <div id="app" />
    <script type="module">
      import {
        html,
        render,
        useEffect,
        useState,
      } from 'https://unpkg.com/htm/preact/standalone.module.js'

      let ws

      function Chat() {
        // Messages
        const [messages, setMessages] = useState([])
        const onReceiveMessage = ({ data }) => setMessages((m) => [...m, data])
        const onSendMessage = (e) => {
          const msg = e.target[0].value

          e.preventDefault()
          ws.send(msg)
          e.target[0].value = ''
        }

        // Websocket connection + events
        useEffect(() => {
          if (ws) ws.close()
          ws = new WebSocket(`ws://${window.location.host}/ws`)
          ws.addEventListener('message', onReceiveMessage)

          return () => {
            ws.removeEventListener('message', onReceiveMessage)
          }
        }, [])

        return html`
          ${messages.map((message) => html` <div>${message}</div> `)}

          <form onSubmit=${onSendMessage}>
            <input type="text" />
            <button>Send</button>
          </form>
        `
      }

      render(html`<${Chat} />`, document.getElementById('app'))
    </script>
  </body>
</html>
Result:
It's a very ugly chat without styles, but functional, because our aim here is to understand how Deno works.
Third-party and deps.ts convention
We can use third-party libraries in the same way we use the Deno Standard Library, by importing directly the URL of the module.
- STD, Deno core libraries: https://deno.land/std/
- X, Deno Third-party libraries: https://deno.land/x/
However, the ecosystem in https://deno.land/x/ is quite small yet. But hey, I have good news for you, we can use packages from https://www.pika.dev. Thanks to tools like Parcel or Minibundle we can compile Node libraries into modules to re-use them in Deno projects.
We are going to use the camel-case package to transform every chat message to camelCase!
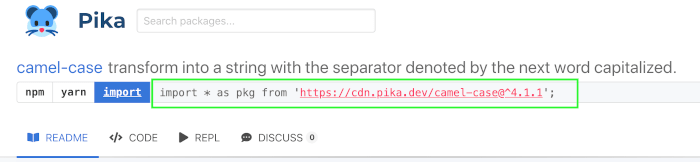
Let's add this import in our chat.ts file:
import { camelCase } from 'https://cdn.pika.dev/camel-case@^4.1.1'
// ...before code
const message = camelCase(typeof event === 'string' ? event : '')
// ... before code
That's it. Running again the server.ts is going to download the camel-case package. Now you can see that it works:
However, if I want to use this camelCase helper in more than one file, it's cumbersome to add the full import everywhere. The URL indicates which version of the package we have to use. This means that if we want to upgrade a dependency we will need to search and replace all the imports. This could cause us problems, but don't worry, there is a Deno convention for the dependencies that solves this. Creating a deps.ts file to export all project dependencies.
// deps.ts file
export { camelCase } from 'https://cdn.pika.dev/camel-case@^4.1.1'
and
// chat.ts file
import { camelCase } from './deps.ts'
// ...
const message = camelCase(typeof event === 'string' ? event : '')
// ...
Testing
We are going to build a useless camelize.ts utility to return the text in camelCase with a nice extra, it includes one 🐪 per uppercase letter. Why? To see how to test it with Deno.
/**
 * Return the text in camelCase + how many 🐪
 *
 * @example "this is an example" -> "thisIsAnExample 🐪🐪🐪"
 * @param text
 * @returns {string}
 */
export function camelize(text: string) {
  // @todo
}
By the way, we can visualize the JSdocs of a file using deno doc [file]:
➜  deno doc camelize.ts
function camelize(text: string)
  Return the text in camelCase + how many 🐪
Let's create a file test.ts. The test runner is built into the core of Deno using the Deno.test() and we can use assertions using the STD https://deno.land/std/testing/asserts.ts.
import { assertStrictEq } from 'https://deno.land/std/testing/asserts.ts'
import { camelize } from './camelize.ts'

Deno.test('camelize works', async () => {
  assertStrictEq(camelize('this is an example'), 'thisIsAnExample 🐪🐪🐪')
})
To run all tests, we just need to execute deno test.
➜  deno test
Compile file:///Users/aralroca/test.ts
running 1 tests
test camelize works ... FAILED (0ms)

failures:

camelize works
AssertionError: actual: undefined expected: thisIsAnExample 🐪🐪🐪
    at assertStrictEq (asserts.ts:224:11)
    at test.ts:5:3
    at asyncOpSanitizer ($deno$/testing.ts:36:11)
    at Object.resourceSanitizer [as fn] ($deno$/testing.ts:70:11)
    at TestApi.[Symbol.asyncIterator] ($deno$/testing.ts:264:22)
    at TestApi.next (<anonymous>)
    at Object.runTests ($deno$/testing.ts:346:20)

failures:

        camelize works

test result: FAILED. 0 passed; 1 failed; 0 ignored; 0 measured; 0 filtered out (0ms)
Of course it fails because we didn't implemented our utility yet, but still, we can see how the errors are displayed in the shell.
After implementing the camelize utility:
import { camelCase } from './deps.ts'

/**
 * Return the text in camelCase + how many 🐪
 *
 * @example "this is an example" -> "thisIsAnExample 🐪🐪🐪"
 * @param text
 * @returns {string}
 */
export function camelize(text: string) {
  const camelCaseText = camelCase(text)
  const matches = camelCaseText.match(/[A-Z]/g) || []
  const camels = Array.from({ length: matches.length })
    .map(() => '🐪')
    .join('')

  return `${camelCaseText} ${camels}`
}
Now all tests pass:
➜  deno test
Compile file:///Users/aralroca/camelize.ts
running 1 tests
test camelize works ... ok (3ms)

test result: ok. 1 passed; 0 failed; 0 ignored; 0 measured; 0 filtered out (3ms)
If you want to use a watcher to not execute everytime all tests, you can use https://deno.land/x/denon/, based on nodemon, and then run denon test.
Now we are ready to use our helper on chat.ts.

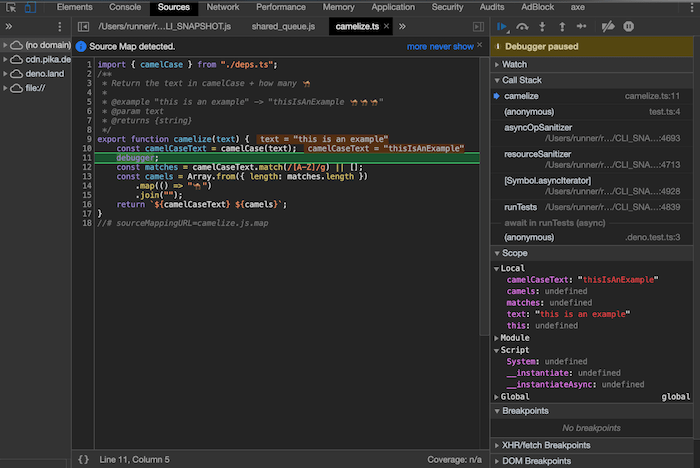
Debugging
In order to debug with Deno:
- Add somewhere in your code a
debugger;line of code. - Run with
--inspect-brkflag.deno run --inspect-brk ...ordeno test --inspect-brk ...to debug tests. - Open
chrome://inspectpage on Chrome. - On the Remote Target section press to "inspect".
- Press the Resume script execution button, the code will pause just in your breakpoint.
Conclusion
We learned about how Deno works by creating a simple chat app in TypeScript. We did it without npm, package.json, node_modules, webpack, babel, jest, prettier... because we don't need them, Deno simplifies this.
We explored important things to begin with a Deno project: Permissions, deno commands, how to use deno internals, how to use third-party dependencies, serving a file, websockets, formating files, testing, debugging, etc.
I hope this article will be useful to start using Deno 1.0.0 in your projects when it comes out on May 13, 2020.
Code of this article
I uploaded the code on my GitHub:
References
- https://deno.land/
- https://github.com/denoland/deno/tree/master/docs
- https://blog.logrocket.com/deno-1-0-what-you-need-to-know/
- https://twitter.com/flaviocopes/status/1259068673966383105
- https://www.youtube.com/watch?v=M3BM9TB-8yA
- https://github.com/denoland/deno
- https://en.wikipedia.org/wiki/Ryan_Dahl